
Lighting for a Catalog Shoot
This summer, I had the pleasure of shooting for a local online retail store’s catalog. This was a new one for me; I’d never done something like this, but have a good relationship with one of the principles at this company, so I agreed to give it a try.
The client in question is Veronica Levy, who runs a Bay-Area fashion blog called Lombard and Fifth. Her brief was deceptively simple: Make it bright, airy, and high-key.
What was unsaid but implied was that the lighting needed to stay consistent from one shot to the next, without variation.
For this shoot, I decided to start simply. I began with one light, a Paul C. Buff Einstein light inside a large umbrella. We were shooting in a relatively small studio, however, so the light didn’t completely wrap around the model, leaving a shadow on the wall behind. We wanted almost no shadows – just enough, in fact, to bring out the texture on some of the clothing. The single light delivered a bit too much of a shadow, so we added additional lighting.
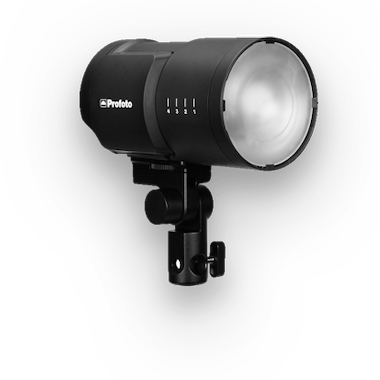
For the additional lighting, I went with something I wouldn’t ordinarily use inside a studio, the Profoto B2 AirTTL on-location kit. The reason I wouldn’t use this in-studio is because it is powered only by battery and there’s no way to shoot with this plugged into an AC socket on the wall.
Fortunately, the kit you rent from BorrowLenses comes with two batteries, so I was reasonably confident that I could have one charging constantly while the other was in use. As it turned out, we only had to swap batteries twice and had power left over after the second swap. Given that this was an 8-hour shoot, that was a pleasant surprise.
The two Profoto heads went into two medium-sized softboxes on camera-left and camera-right, not quite at 45º to the subject, but closer to the camera. The Einstein was an on-axis light, just to the right and above the camera. In fact, I had the bottom of the large umbrella actually pushed up just a bit by the camera’s lens, and had to use a hood to prevent flaring.

We worked in very tight quarters. If you look to the far left, you can just see the camera lens protruding under the umbrella.
The subject-to-background distance was minimal – about 12–18 inches. From there to the camera lights, it was 6–8 feet, and perhaps another few inches to the camera. The lights on the side were set roughly two stops below the level of the main light, give or take a few tenths of a stop.
Since we were shooting the models on a white background where the seamless roll of paper actually extended almost to the camera’s location, I wasn’t worried about needing something to bounce the light upwards; the white floor did the task just fine. Similarly, I didn’t need a hairlight, as the high-key background and the light bouncing off it provided plenty of separation.
Now, if you recall, I mentioned that the brief was deceptively simple. “Deceptively” because as it turned out, the high-key look wasn’t as easy to pull off given the space and lighting constraints. It took us a solid hour to get the lights set up the way we wanted, and that’s after having done some prep the day before with the flower backdrop rig installed.
Turns out, when you add things like multiple models, slight variances in the lights that needed to be introduced to compensate for super-bright or super-dark outfits, and a flaky radio remote (I was using a defective Cyber Commander I owned before I switched to the more reliable Profoto triggers rented from BL), things can get somewhat hairy.
Then toss in the fact that even with the slight variances in lighting to compensate for outfits, you still need to stay super-consistent with your look and you have to resign yourself to doing a bit of that adjusting in post.

There were a number of white-on-white shots like this that needed to stay consistent and retain detail in the clothing (inset).
Fortunately, advance prep and a tethered workflow during shooting allowed us to spot most major (and many minor) issues that would’ve been a pain to solve in post. By shooting tethered into Capture One, I was able not only to have a relatively massive 15″ screen previewing my work, I was also able to introduce a few basic adjustments that let me see what my RAW files would look like in post. That in turn led me to tweak the lights before we began the main round of shots, after which it was as simple as checking focus every so often on the lens I was using and making sure that the framing was right.
Post was done primarily in Capture One and Photoshop and proved to be a relative breeze. In fact, many shots were used almost straight out of camera, especially if they were used in relatively small sizes on the web. Some things, like cleaning up the paper on the floor on shots taken towards the end of the shoot where things got a bit dirty on the white paper, were a bit more tricky, but Photoshop’s healing and cloning tools took care of it.
Final Thoughts
Here’s what I came a way from this shoot with:
- Prep in advance and make a note of your lighting ratios before the shoot.
- Get the set completed the day before. Don’t try and do it all the same day because you have to factor the effect on your lighting.
- Be prepared to vary your lighting ratios during the shoot. For me, lowering the power on the two Profoto heads turned out to be key in compensating for exposure.
- Pick lights that will be consistent throughout the shoot. I used to own some no-brand strobes from a Chinese company and remembered that, towards the end of a shoot, they tended to shift color. Both the Einsteins and the Profoto heads are known for their consistency.
- Don’t get fancy with your setup. I had to eliminate shadows, so I bracketed my subjects with lights. That did the key.
- Shoot tethered and keep a reference shot open that you can check against to make sure you haven’t unknowingly or subconsciously changed the lighting or framing for your shoot.
Toward the end of this shoot, we were blowing through a look in less than three to five minutes, especially for some of the more experienced models. You will find that, for a catalog shoot, you will quickly catch on to what shots you need and how to move through them quickly. Consistency will become second nature but you also have to watch it because so will complacency. In the end, if you keep an eye on that “reference” image and have a way of checking your work, preferably on a large screen, you’ll be fine.
Here is a collection of selects from that shoot.



Prerit Singh
Hey Sohail Mamdani,
I personally like the guides in your mentioned post , it purely sort many things running across my mind. Appreciate your efforts and hard work you deliver while writing this blog.
To know Ultimate 6 Tips for Perfect Catalog shoot [CATALOGUE SHOOT 101: GETTING THE BASICS RIGHT]
Go to : https://odndigital.com/catalogue-shoot-101-getting-the-basics-right/
Contact us at – https://odndigital.com/